Oakley Ramblers
Menu
Skip to content
Home
How to plan a walk
Latest News
Next walk
Walks Diary 2026
Walk Reports Published in The Link
Walks History and Individual Walk Reports
Contact Us
Gallery
Reference Docs
Safety
Walk Details Template
Walk Leaders’ Guide
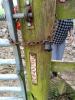
Danger Below
‹ Return to
Gallery
Posted on
March 11, 2019
by
wayfarersway1
Like
Loading...
Privacy & Cookies: This site uses cookies. By continuing to use this website, you agree to their use.
To find out more, including how to control cookies, see here:
Cookie Policy
Subscribe
Subscribed
Oakley Ramblers
Join 60 other subscribers
Sign me up
Already have a WordPress.com account?
Log in now.
Oakley Ramblers
Subscribe
Subscribed
Sign up
Log in
Copy shortlink
Report this content
View post in Reader
Manage subscriptions
Collapse this bar
%d